Advertisements
Advertisements
Question
Solution

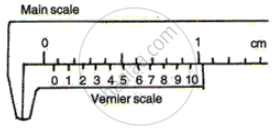
(a) Positive zero error

When two jaws are in contact, the zero of the vernier must coincide with the zero of the main scale. If this is not so, the instrument has zero error. These are of two types:-
a. If the zero of the vernier scale lies to the right of the zero of the main scale then it is called a positive zero error.
b. If the zero of the vernier scale lies to the left of the zero of the main scale then it is called negative zero error
To determine the zero error, note the vernier division coinciding with any main scale division when two jaws are completely closed. Suppose nth division is coinciding with the main scale. Multiply this with the least count of vernier caliper.
Positive zero error = n × L.C.
Negative zero error = - (10 - n) × L.C.
To get the correct reading, the zero error is usually subtracted from the observed reading with its proper sign
Correct reading = observed reading - zero error
APPEARS IN
RELATED QUESTIONS
The wavelength of light is 589 nm. what is its wavelength in Å?
Name the part of the vernier callipers which is used to measure the following
Thickness of a pencil.
Name the instrument which can accurately measure the following
The internal diameter of the neck of a water bottle
Up to how many decimal places can a common vernier callipers measure the length in cm?
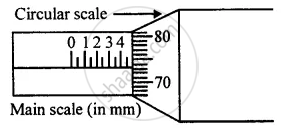
Figure shows a screw gauge in which circular scale has 100 divisions. Calculate the least count and the diameter of a wire.

What do you understand by the following term as applied to micrometre screw gauge?
Thimble scale
How the backlash error is avoided?
The following diagrams (Fig. 5) show the use of a vernier caliper under three different situations. Study the diagrams carefully and note down the vernier readings in each case.

(a) Measuring the diameter of the rod

(b) Measuring Internal diameter of a cavity

(c) Measuring depth of a cavity
