Advertisements
Advertisements
Question
A micrometre screw gauge has a negative zero error of 7 divisions. While measuring the diameter of a wire the reading on the main scale is 2 divisions and 79th circular scale division coincides with baseline.
If the number of divisions on the main scale is 10 to a centimetre and circular scale has 100 divisions, calculate
- pitch
- observed diameter
- least count
- corrected diameter.
Solution
(1) The number of divisions on the main scale are 10 to a centimetre
⇒ Pitch = `"Unit"/"No. of divisions in unit"=(1 "cm")/10` = 0.1 cm
(2) No. of circular scale divisions = 100
∴ Least count (L.C.) = `"Pitch"/"No. of circular scale divisions"`
= `0.1/100` cm
= 0.001 cm
(3) Main scale reading = 2 division
⇒ Main scale reading = 2 × Pitch = 0.2 cm
Circular scale reading = 79 division
∴ Observed diametre = M.S. reading + L.C. × C.S. reading
= 0.2 + 0.001 × 79
= 0.2 + 0.079 cm
= 0.279 cm
(4) Negative zero error = 7 division
∴ Correct = −(−7 × L.C.)
= −(−7 × 0.001) cm
= +0.007 cm
Correct diametre = Observed diametre + Correction
= 0.279 + 0.007
= 0.286 cm
APPEARS IN
RELATED QUESTIONS
The final result of the calculation in an experiment is 125,347,200. Express the number in term of significant place when accuracy is between 1 and 10
(a) A vernier scale has 10 divisions. It slides over the main scale, whose pitch is 1.0 mm. If the number of divisions on the left hand of zero of the vernier scale on the main scale is 56 and the 8th vernier scale division coincides with the main scale, calculate the length in centimetres.
(b) If the above instrument has a negative error of 0.07 cm, calculate the corrected length.
Which part of vernier callipers is used to measure the external diameter of a cylinder?
The circular scale of a screw gauge has 100 divisions. Its spindle moves forward by 2.5 mm when given five complete turns. Calculate
- pitch
- least count of the screw gauge
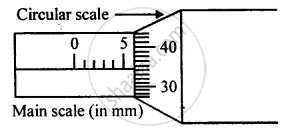
Figure shows a screw gauge in which circular scale has 200 divisions. Calculate the least count and radius of the wire.

What do you understand by the term least count of screw?
The level of water in a measuring cylinder is 12.5 ml. When a stone is lowered in it, the volume is 21.0 ml. Find the volume of the stone.
Name the measuring employed to measure the thickness of a paper.
Least count of a vernier caliper is ______ cm.
