Advertisements
Advertisements
Question
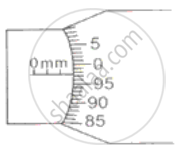
A micrometre screw gauge has a negative zero error of 8 divisions. While measuring the diameter of a wire the reading on the main scale is 3 divisions and the 24th circular scale division coincides with baseline.
If the number of divisions on the main scale are 20 to a centimetre and circular scale has 50 divisions, calculate
- pitch
- observed diameter.
- least count
- corrected diameter.
Solution
(1) The number of divisions on the main scale are 20 to a centimetre
⇒ Pitch = `"Unit"/"No. of divisions in unit"=(1 "cm")/20` = 0.05 cm
(2) No. of circular scale divisions = 50
∴ Least count (L.C.) = `"Pitch"/"No. of circular scale divisions"`
= `0.05/50` cm
L.C. = 0.001 cm
(3) Main scale reading = 3 division
⇒ Main scale reading = 3 × Pitch = 3 × 0.05 = 0.15 cm
Circular scale reading = 24 division
∴ Observed diametre = M.S. reading + L.C. × C.S. reading
= 0.15 + 0.001 × 24
= 0.15 + 0.024
= 0.174 cm
(4) Negative zero error = 8 division
Correction = −(−8 × L.C.)
= −(−8 × 0.001) cm
= +0.008 cm
Correct diametre = Observed diametre + Correction
= 0.174 + 0.008
= 0.182 cm
APPEARS IN
RELATED QUESTIONS
State three uses of the vernier callipers.
Why is the metre length in terms of the wavelength of light considered more accurate?
How do you account for positive zero error for calculating the correct diameter of wires?
In the following figure, the pitch of the screw is 1 mm. Calculate:
(i) the least count of screw gauge and
(ii) the reading represented in the figure.

Consider the following case where the zero of vernier scale and the zero of the main scale are clearly seen. If L.C. of the vernier calipers is 0.01 cm, write the zero error and zero correction of the following.

The following figure shows the reading of a vernier caliper used for measuring the thickness of a metal sheet.
(i) Find the least count of the instrument.
(ii) Calculate the thickness of the metal sheet.

