Advertisements
Advertisements
Question
How do you account for positive zero error for calculating the correct diameter of wires?
Solution
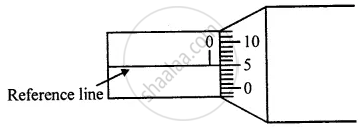
If the zero lines, marked on a circular scale, is below the reference line of the main scale, then there is a positive zero error and the correction is negative. In figure 5th, circular scale division is coinciding with the reference line.
∴ Correction = – Coinciding division of C.S. × L.C.
= – 5 × 0.001 cm
= – 0.005 cm
If the observed diameter is 0.557 cm, then:
Corrected diameter
= Observed diameter + Correction
= 0.557 cm – 0.005 cm
= 0.552 cm

APPEARS IN
RELATED QUESTIONS
Name the two scales of a vernier callipers and explain how it is used to measure length correct up to 0.01 cm.
Name the part of the vernier callipers which is used to measure the following
External diameter of a tube
State the purpose of ratchet in a screw gauge.
Up to how many decimal places can a common vernier callipers measure the length in cm?
Which part of vernier callipers is used to measure the internal diameter of a hollow cylinder?
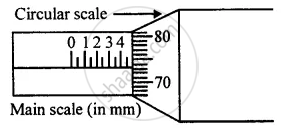
Figure shows a screw gauge in which circular scale has 100 divisions. Calculate the least count and the diameter of a wire.

What do you understand by the following term as applied to micrometre screw gauge?
Thimble
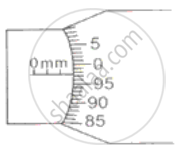
In the following figure, the pitch of the screw is 1 mm. Calculate:
(i) the least count of screw gauge and
(ii) the reading represented in the figure.

State whether the following statement is true or false by writing T/F against it.
The diameter of a wire can be measured more accurately by using vernier calipers than by a screw gauge.
